
DIFFICULTY: Intermediate
In a previous post I outlined how to perform cross browser testing on a responsive application leveraging C# and NUnit for Selenium. And now it’s time for Java/JUnit’s turn!
Responsive applications can give us DRASTICALLY different experiences depending on the size of the end user’s window.
Consider how different a mobile site looks and behaves to that of the same site on a desktop, or how easy it is to miss the sometimes subtle differences between a site displayed on a tablet versus a desktop.
For those reasons, we have to test against various window sizes in addition to the browser types. And I’m going to show you a straight forward approach on how to do just that.
In this tutorial, we are going to automate a simple responsive e-commerce application at automationpractice.com across multiple browsers AND window sizes.
Step 1: Clone the Repository
Again, if you prefer to work with C# and NUnit, you can follow this link. Otherwise, clone the repository below!
Step 2: Add Dependencies
I build my Java solutions using Maven, and as such I am able to leverage the pom.xml to specify my project dependencies. In my project’s pom.xml file, I add the following to my <dependencies> node.
Note: Please ensure you are adding JUnit 4 to your dependencies and not JUnit 5. This solution will not work with JUnit 5!
   <dependencies>
	<dependency>
		<groupId>junit</groupId>
		<artifactId>junit</artifactId>
		<version>4.12</version>
		<scope>test</scope>
	</dependency>
  	<dependency>
  		<groupId>io.github.bonigarcia</groupId>
  		<artifactId>webdrivermanager</artifactId>
  		<version>4.1.0</version>
  	</dependency>
  	<dependency>
  		<groupId>org.seleniumhq.selenium</groupId>
  		<artifactId>selenium-chrome-driver</artifactId>
  		<version>4.0.0-alpha-2</version>
  	</dependency>
  	<dependency>
  		<groupId>org.seleniumhq.selenium</groupId>
  		<artifactId>selenium-support</artifactId>
  		<version>4.0.0-alpha-2</version>
  	</dependency>
  	<dependency>
  		<groupId>org.seleniumhq.selenium</groupId>
  		<artifactId>selenium-server</artifactId>
  		<version>4.0.0-alpha-2</version>
  	</dependency>
  </dependencies>
Step 3: Create Our Enums
We are going to pass along two parameters for each test to determine the browser (Chrome, Firefox, Edge) and device type (Desktop, Tablet, Phone).
In order to do this, we will first create two enum classes called…you guessed it…Browser and Device, respectively.
public enum Browser {
    Chrome,
    Firefox,
    Edge,
    Phone
}
public enum Device {
    Desktop,
    Tablet,
    Phone
}
Step 4: Create a Driver Factory
The driver factory is a bit long-ish, but this is where all the heavy lifting takes place. In order to properly digest it, I’m going to break it up into chunks and explain what we are doing each step of the way.
The following method is what accepts our Browser and Device values and passes along the appropriate WebDriver object. The way it receives these values is through a little bit of JUnit magic, which I will discuss shortly.
    public static WebDriver WebDriver(Browser type, Device device)
    {
        WebDriver driver = null;

        switch (type)
        {
            case Edge:
                driver = EdgeDriver(device);
                break;
            case Firefox:
                driver = FirefoxDriver(device);
                break;
            case Chrome:
                driver = ChromeDriver(device);
                break;
            case Phone:
                driver = PhoneDriver();
                break;
        }
        return driver;
    }
The ChromeDriver method is going to make use of the ChromeOptions arguments to either use mobile emulation (to return a tablet view) or explicitly pass what window size we want for the desktop view.
    private static ChromeDriver ChromeDriver(Device device)
    {
        ChromeOptions options = new ChromeOptions();
        WebDriverManager.chromedriver().setup();
        switch (device)
        {
            case Desktop:
                options.addArguments("--window-size=1200,700");
                break;
            case Tablet:
            	Map<String, String> mobileEmulation = new HashMap<>();
            	mobileEmulation.put("deviceName", "iPad");
            	options.setExperimentalOption("mobileEmulation", mobileEmulation);
                options.addArguments("--window-size=768,700");
                break;
			default:
				break;
        }
        return new ChromeDriver(options);
    }
The Firefox driver doesn’t have as direct of an implementation as Chrome does to explicitly specify a mobile device emulator, so we instead pass window size arguments both for desktop and tablet views.
    private static FirefoxDriver FirefoxDriver(Device device)
    {
    	WebDriverManager.firefoxdriver().setup();
        FirefoxOptions options = new FirefoxOptions();
        switch (device)
        {
            case Desktop:
                options.addArguments("--width=1200");
                options.addArguments("--height=700");
                break;
            case Tablet:
                options.addArguments("--width=768");
                options.addArguments("--height=700");
                break;
			default:
				break;
        }
        return new FirefoxDriver(options);
    }
There is a handy tool called Selenium Tools for Microsoft Edge . This tool allows us to test against Microsoft Edge Chromium and make use of the same mobile emulation as Chrome. While C#, JavaScript and Python all can leverage this tool, there is no such implementation for Java. Sad times. Therefore, we need to find a new way to adjust our view port sizes.
Sadly, there also did not appear to be a straight forward way to pass window size arguments prior to creating the driver instance. Instead, we set the window size after the fact, as shown below.
    private static EdgeDriver EdgeDriver(Device device)
    {
    	WebDriverManager.edgedriver().setup();
        EdgeOptions options = new EdgeOptions();
        EdgeDriver _driver = null;
        switch (device)
        {
            case Desktop:
                _driver = new EdgeDriver(options);
                _driver.manage().window().fullscreen();
                break;
            case Tablet:
                _driver = new EdgeDriver(options);
                _driver.manage().window().setSize(new Dimension(768, 700));
                break;
			default:
				break;
        }
        return _driver;
    }
Finally, we have a class that will create an instance of a phone browser using, again, Chrome mobile emulation.
private static WebDriver PhoneDriver()
{
    ChromeOptions options = new ChromeOptions();
    WebDriverManager.chromedriver().setup();
    Map<String, String> mobileEmulation = new HashMap<>();
    mobileEmulation.put("deviceName", "iPhone X");
    options.setExperimentalOption("mobileEmulation", mobileEmulation);
    return new ChromeDriver(options);
}
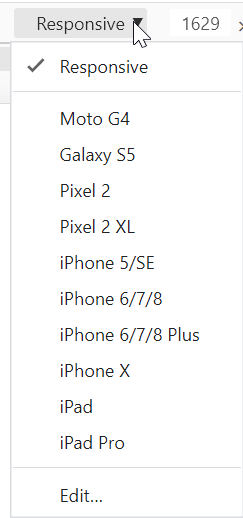
NOTE: The mobileEmulation.put(“deviceName”, “__DEVICE__”) method takes a number of device names. You can view these options by opening up Developer Tools > pressing Ctrl + Shift + M > clicking on the device drop down shown here:
Here is our DriverFactory class in its entirety:
public class DriverFactory {
public static WebDriver WebDriver(Browser type, Device device)
{
    WebDriver driver = null;

    switch (type)
    {
        case Edge:
            driver = EdgeDriver(device);
            break;
        case Firefox:
            driver = FirefoxDriver(device);
            break;
        case Chrome:
            driver = ChromeDriver(device);
            break;
        case Phone:
            driver = PhoneDriver();
            break;
    }
    return driver;
}

private static WebDriver PhoneDriver()
{
    ChromeOptions options = new ChromeOptions();
    WebDriverManager.chromedriver().setup();
    Map<String, String> mobileEmulation = new HashMap<>();
    mobileEmulation.put("deviceName", "iPhone X");
    options.setExperimentalOption("mobileEmulation", mobileEmulation);
    return new ChromeDriver(options);
}

private static ChromeDriver ChromeDriver(Device device)
{
    ChromeOptions options = new ChromeOptions();
    WebDriverManager.chromedriver().setup();
    switch (device)
    {
        case Desktop:
            options.addArguments("--window-size=1200,700");
            break;
        case Tablet:
            Map<String, String> mobileEmulation = new HashMap<>();
            mobileEmulation.put("deviceName", "iPad");
            options.setExperimentalOption("mobileEmulation", mobileEmulation);
            options.addArguments("--window-size=768,700");
            break;
        default:
            break;
    }
    return new ChromeDriver(options);
}

private static FirefoxDriver FirefoxDriver(Device device)
{
    WebDriverManager.firefoxdriver().setup();
    FirefoxOptions options = new FirefoxOptions();
    switch (device)
    {
        case Desktop:
            options.addArguments("--width=1200");
            options.addArguments("--height=700");
            break;
        case Tablet:
            options.addArguments("--width=768");
            options.addArguments("--height=700");
            break;
        default:
            break;
    }
    return new FirefoxDriver(options);
}


private static EdgeDriver EdgeDriver(Device device)
{
    WebDriverManager.edgedriver().setup();
    EdgeOptions options = new EdgeOptions();
    EdgeDriver _driver = null;
    switch (device)
    {
        case Desktop:
            _driver = new EdgeDriver(options);
            _driver.manage().window().fullscreen();
            break;
        case Tablet:
            _driver = new EdgeDriver(options);
            _driver.manage().window().setSize(new Dimension(768, 700));
            break;
        default:
            break;
    }
    return _driver;
}
}
Step 5: Create Your Tests
We’re going to keep this test very simple and straight forward. We are going to use each browser and device combo to open the application and verify the presence of the logo.
That’s it!
First, we are going to create our test class, and we are going to decorate it with the @RunWith(Parameterized.class) annotation. This annotation will tell our tests we have parameters we wish to pass along to the test, and we are going to do so by passing them into the constructor.
As noted above in Step 2, this is the reason we are using JUnit 4 and not JUnit 5 is that the @RunWith() decorator was removed in JUnit 5.
Notice the constructor takes two parameters: Browser and Device.
@RunWith(Parameterized.class)
public class CrossBrowserTests {
    private static WebDriver _driver;
    private static String _applicationPath ="http://automationpractice.com/index.php";
    private Browser _browser;
    private Device _device;

    public CrossBrowserTests(Browser browser, Device device)
    {
    	_browser = browser;
    	_device = device;
    }
}
How do we pass in the browser/device combos we want to test with? I’m glad you asked.
We add a static Collection with an array of the different browser and device combinations we for our test class to run through, and we decorate that collection with the @Parameters annotation:
    @Parameters
    public static Collection browsersStrings(){
      return Arrays.asList(new Object[][]
    	  {
	    	  {Browser.Chrome, Device.Desktop},
	    	  {Browser.Firefox, Device.Desktop},
	    	  {Browser.Edge, Device.Desktop},
	    	  {Browser.Chrome, Device.Tablet},
	    	  {Browser.Firefox, Device.Tablet},
	    	  {Browser.Edge, Device.Tablet},
	    	  {Browser.Phone, Device.Phone}
    	  });
    }
This is tells us it wants to run the tests in the class 7 times in total, once for each browser and device combination. You can add or remove combinations as you see fit!
In order to properly pass along the values to our DriverFactory, we need to instantiate the _driver object in a Setup() method. The below Setup method will take whichever iteration of the collection we are on at the time, pass the values into our CrossBrowserTests constructor, then feed those to our DriverFactory.WebDriver method.
And we will automagically get our browser instance with the viewport size we specify!
    @Before
    public void Setup() {
        _driver = DriverFactory.WebDriver(_browser, _device);
        _driver.navigate().to(_applicationPath);
    }
The only thing left to do is add our test and you’re all set.
The test class is posted below, in its entirety:
@RunWith(Parameterized.class)
public class CrossBrowserTests {
    private static WebDriver _driver;
    private static String _applicationPath ="http://automationpractice.com/index.php";
    private Browser _browser;
    private Device _device;

    public CrossBrowserTests(Browser browser, Device device)
    {
    	_browser = browser;
    	_device = device;
    }

    @Parameters
    public static Collection browsersStrings(){
      return Arrays.asList(new Object[][]
    	  {
	    	  {Browser.Chrome, Device.Desktop},
	    	  {Browser.Firefox, Device.Desktop},
	    	  {Browser.Edge, Device.Desktop},
	    	  {Browser.Chrome, Device.Tablet},
	    	  {Browser.Firefox, Device.Tablet},
	    	  {Browser.Edge, Device.Tablet},
	    	  {Browser.Phone, Device.Phone}
    	  });
    }

    @After
    public void TearDown()
    {
        _driver.quit();
    }

    @Before
    public void Setup() {
        _driver = DriverFactory.WebDriver(_browser, _device);
        _driver.navigate().to(_applicationPath);
    }

    @Test
    public void VerifyLogo() {
        assertTrue(_driver.findElement(By.id("header_logo")).isDisplayed());
    }
 }
And that’s it, you’re done!
You can build onto this framework to include more device types beyond Apple products, as well as passing explicit viewports in addition to the browser and device type. Whatever you want to do, it’s incredibly extensible.


Siva
Thanks, its a great content.